Configuration
Creating a service account and obtaining API keys via Google Cloud Console is a multi-step process. Here is a detailed guide to help you navigate these steps. You can add screenshots to each step to make the guide clearer.
Step 1: Logging into Google Cloud Console
- Open your browser and go to Google Cloud Console.
- Log in with your Google account. If you don't have one, you will need to create one.
Step 2: Creating a New Project
-
In the Google Cloud Console dashboard, click on the project selector at the top of the page.
-
Click on 'New Project'.
-
Enter a name for your project, and, if necessary, select an organization.
-
Click on 'Create'.

Step 3: Creating a Service Account
-
In the Google Cloud Console navigation menu, go to 'IAM & Admin' > 'Service Accounts'.
-
Click on 'Create a service account'.
-
Enter a name and description for the service account.
-
Click on 'Create'.

Step 4: Assigning Roles to the Service Account (Optional)
- On the 'Grant this service account access to project' screen, select an appropriate role. For example, for Google Sheets integration, you might choose 'Sheets Editor'.
- Click on 'Continue'.
Step 5: Creating the Service Account Key
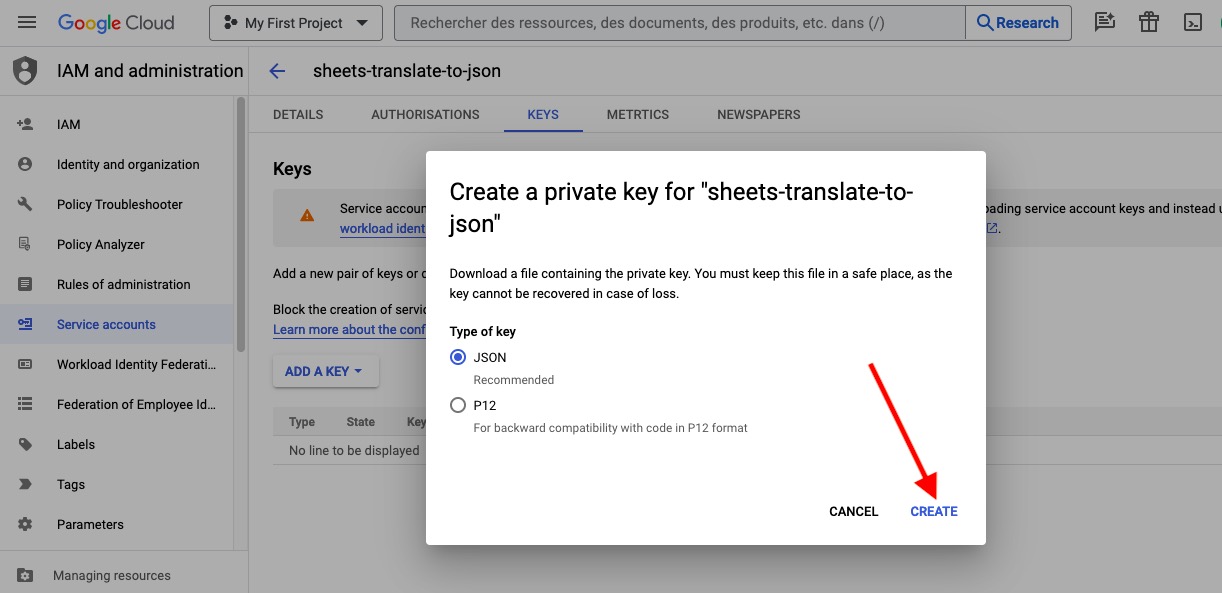
- On the service account details page, click on 'Add key' then 'Create new key'.
- Choose the key format (JSON is recommended) and click on 'Create'.
- A JSON file containing your key will be downloaded to your computer. Keep this file safe.


Step 6: Enabling Necessary APIs (if needed)
- In the navigation menu, go to 'APIs & Services' > 'Library'.
- Search for and enable the APIs needed for your project. For example, for Google Sheets, search for and enable the Google Sheets API.

Conclusion
You now have a service account with an API key that you can use to authenticate your applications with Google Cloud services. Make sure to keep your key safe and not share it publicly.